I’ve decided to try to flex my storytelling and my deckbuilding muscles at the same time, and build a new Commander deck for myself (my first in over a decade, it’s not really been my format to date). I’m going to try to tell the story of the Back to the Future trilogy, using only existing cards. I’m intending to rename where necessary, and create a full set of printable proxies so I can play with the story version (I’ll need to trade for the actual versions of a few cards, having them all to hand so that people know it’s purely for aesthetics).
Choosing the colours
It’s pretty clear that Doc is predominantly Blue–he makes artifacts, he invents, he’s a scientist, he’s a time-traveller: all Blue traits.
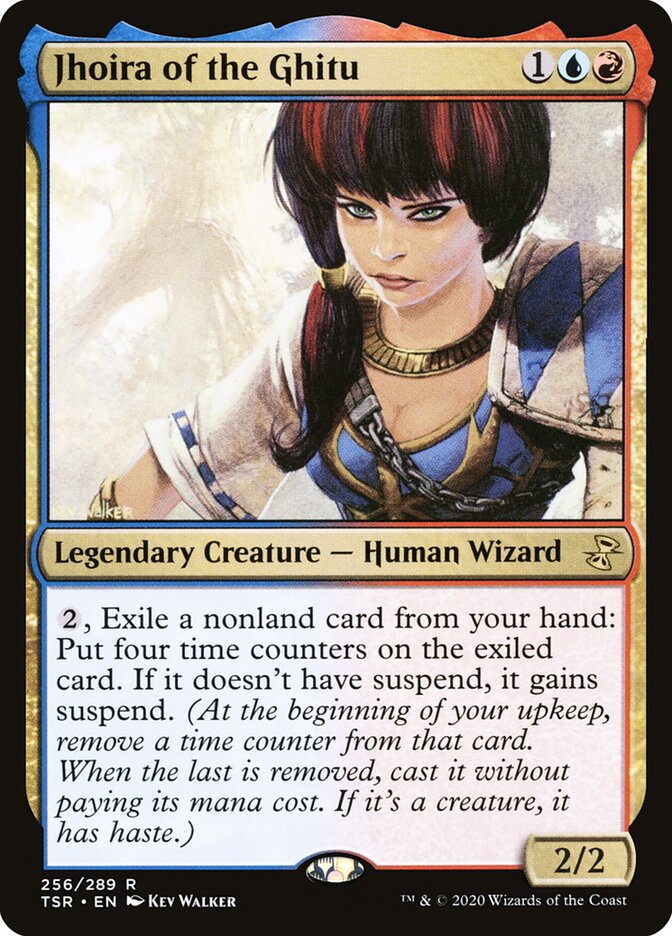
Marty is a little bit harder to pin down, but I think given his desire to prove himself, and his inability to handle being called “chicken”, and the amount of fights he gets into, I’m gonna say he’s predominantly Red. I looked at commanders in Izzet (red/blue), and picked out Jhoira of the Ghitu as a potential time-oriented mechanic, and as a 2/2, it seemed easy to make this be something like “Doc and Marty, Time Travelers”. I’ve explored that colour combination a bit, and I think I can make it work.
The idea with this deck would be to have some of the high cost taken-an-extra-turn sorceries in that deck that could be Suspended. I’ve added about 30-40 cards to this deck so far, hoping to complete it soon enough.
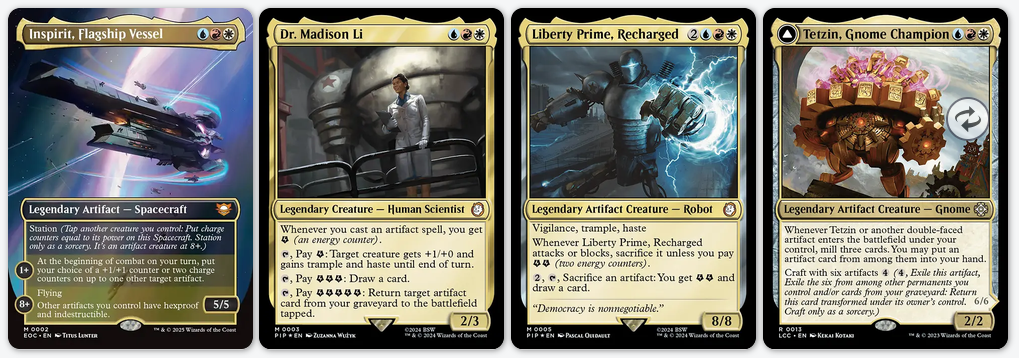
However, I discovered that as I designed it there were a lot of moments from the movies I wanted to incorporate that couldn’t quite make it in easily in just Izzet, so I examined which other of the three colours I could to be able to include them. Black was out–there’s nothing really evil or dark about these movies or characters–so that left me with Green or White. Given the number of Humans in the movie, both of these were good choices, but with the overall sub-theme of Artifacts in White, I decided to search in Jeskai for commanders. There are only 50 total, and only four who have any kind of Artifacts connection.
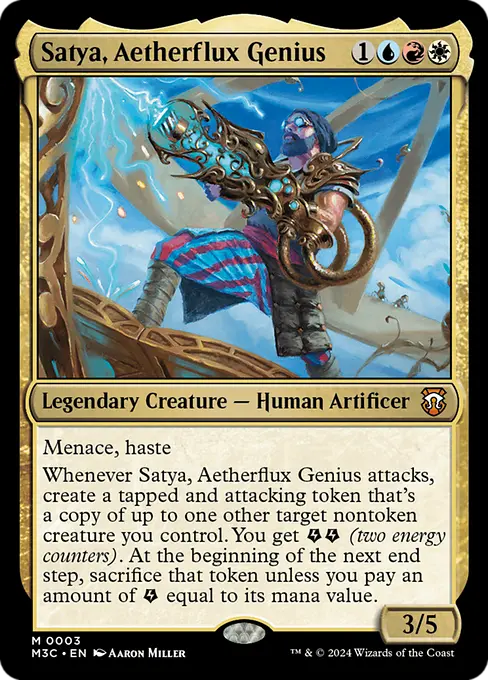
I thought about having Inspirit be the DeLorean but it doesn’t make a ton of sense mechanically, so rejected that one. The Gnome Champion makes no sense whatsoever, but the other two had some possibilities. It then led me to search for any commanders who had an energy token in their oracle text, so I found Satya, Aetherflux Genius.
Satya works as a Marty and Doc card (Menace works if you think of it as “you need two creatures to block us because we also are two creatures”), and they definitely have Haste, given how they can arrive in the nick of time (although one could argue that Marty seems to get quite a bit of summoning sickness in the movies).
The tapped and attacking token? That’s Marty from another timeline come to help, or the DeLorean you hid in an abandoned mine for 70 years.
I’m thinking of the energy counters as “flux” in the Flux Capacitor sense of the word. Timestuff. Chono-mana. Ya know, flux.
I’m going to try to build this deck out also, and I’ll post some articles about card choices as I make them and test out the deck. My goal is to nail the feel of the movies, and also having a working Commander deck, without having to invent any new cards (but maybe rename a few existing ones like Satya here).
I’ve not ever written about Magic, despite having played it on off more or less since its inception. I think part of the reason for that is that the game changes very quickly, and I get frustrated with it, or with the community, or with the pay-to-play aspects of it and then I walk away from it.
I started playing back when I worked in a tiny hobby story called The Dungeon. I pretty much spent all my meager earnings on buying boosters for Revised Edition, Legends and The Dark. I taught a lot of people how to play, and my local comic book store then became a hub for playing and trading. There were no online guides on how to play. We had heard that Black Lotus was a really good card, but nobody knew why (nor had one). When we did eventually find one, it was kind of a let down–until we figured out the ridiculous combos it enables, and then I tried like hell to trade for one (spoiler: I never got one). I kept playing through Ice Age and Fallen Empires. Homelands came out (the worst set in Magic History, with probably zero cards to redeem the whole set) and Wizards announced they’d never print powerful cards like Black Lotus again: this combination of events caused me to stop playing.
I dabbled a bit on occasion over the next 10 years or so, but mostly I was busy having kids and moving around the world. It wasn’t until my kids started to get into board games again and I moved to a place where my closest coffee shop was also a game store that I started to get back into it. This was early 2011, when the Scars of Mirrodin block was being played, and Jace, the Mind Sculptor was dominating Standard. I slowly learned how to draft, and built a deck for Standard, eventually settling on playing Elves because everything else was just too expensive. I attended a few Pro-Tour Qualifiers, and did OK, coming away with more wins than losses. I traded aggressively to start to build a Modern deck when that was first announced. I became a Rules Advisor and found a Judge to mentor me. And then life happened–I don’t even remember exactly what, but I didn’t have the time or the passion to keep playing, so I stopped, sometime around the end of the Innistrad block. I sold all my cards, except for an Elf deck for EDH.
My kids got into playing it around War of the Spark, but it wasn’t until I was living on my own for a period during Covid that I really got back into playing again. I played on Arena a bunch (I have a screenshot where I was rated in the top 250 worldwide briefly) playing Werewolves in Standard. As restrictions eased, I drafted Kaldheim and New Capenna, and a few others, mostly to be social (and with Arena to pass the time while living alone). Modern had moved on a lot, but you couldn’t play it on Arena. I didn’t start to play competitively again in person.
And now one of my kids has got back into it in a fairly big way, playing daily online with their friends, and going to our local store for Commander games. I’m not a big fan of the Commander format as the games take a really long time to play and there’s a lot of not doing anything–it’s very much like a beer and pretzels version of Magic, and I much prefer the fast-paced duels. However, I’m learning to just treat it as a chance to chat rather than worrying about the playing.
I’m vaguely considering getting into playing Standard or Modern again, but the proliferation of Universes Beyond sets is … meh. Outside of this game, I’m a pretty big fan of TMNT, Marvel, and so forth. I’m just not convinced they belong in Magic. Well, it’s not my choice, I guess. And, like every other sucker out there, I’m sure I’ll spend money to have cards with some of my favourite characters on them (they better print a Garak card in the Star Trek set, just sayin’).
Wheel of Misfortune marks a new chapter. This was our first jam as Golden Grove Games–we added Alex to the team and set up goldengrovegames.com to be an indie studio site rather than a list of game jams and mods we had built. New engine too: Godot (turns out much easier than Unity to use).
We built it for ShroomJam 2025, where the theme was “Retro TV.” The concept was Wheel of Fortune, but roguelike, and set in hell. You solve word puzzles like in the TV show, but add more wedges to your wheel and other artifacts to help make it easier to solve the puzzles. There had to be a Rubber Duck, so we made it an artifact.
The game actually works (which, after Airlocked!, I don’t take for granted). We got an honourable mention from Vinesauce for being addictive to play, which is about the best compliment a game jam entry can get.
We’ve already patched a couple of issues since the jam–a soft lock when all consonants were guessed, and a music swap after a copyright flag–and we’re planning a full release with more content.
Edit: Sisters of the Thorn are M8, not M9. My bad 🙁
I’ve written a bunch of posts about all the different units in the Wood Elves army roster for Warhammer: The Old World, and as I’ve played the army more over the last lot of months and answered questions on Discord, I figured I should write a guide for those folks who are new to the army and don’t know what to buy or buy first. This is an opinionated and abbreviated guide to helping you get started with a Wood Elf army, with advice on what units to start with and how to use them together. No doubt lots of folks have different opinions on how to do this, and that’s great – write a guide and I’ll link it here! This is a starting point. Feel free to copy/modify any of the lists to suit the models you already have.
The links sprinkled throughout this guide will take you to a deeper look at any given unit. This guide assumes you are trying to build a 2,000 point army that can be used for both casual games and organized play, and want to get there by aiming for 1k then 1.5k. I’ve listed “what’s in” and “what’s out” meaning what units are good for beginners and are part of these lists, and which ones I’ve left out with a brief explanation for why. Everything I’ve left out is still good in its own way, but needs a bit more familiarity with the game and the army before adding.
Treeman vs Dragon
Before you start, ask yourself if you are going to have a Forest Dragon in your list. The list you run with a Dragon is a bit different from the one you run without the Dragon, so I’ve created two paths (six lists). One for players who want a Dragon, and one for those who don’t (which uses a Treeman and Great Stag instead).
Not everyone likes to run a Dragon, nor is every game suitable for it. However, it is a very strong option for a beginner because a) it looks cool, b) it gives you 500 points with just one model to buy, build and paint, c) it’s literally the punchiest unit in the army list, and d) it can be built for durability.
I think the Dragon path is probably the more competitive build, but still requires learning on how best to use and deploy. I don’t use a Dragon, but then again I’m not playing ultra-competitively, and I like my Tree Spirit models.
If you’re following the Dragon Path, I have highlighted all the relevant passages in red so that you can just read those bits instead. This list is likely to win big or lose big.
If you’re following the Treeman Path (The Way of the Leaf? nope, wrong world!) it uses the green background. This list is more balanced between attack and defense, and a mix of Elves and Tree Spirits, and uses the common hammer/anvil tactic (whereas the Dragon list is mostly all hammer and all Elves).
Any advice that’s relevant for both will be both just plain text.
Key Wood Elf Concepts
Regardless of which list you are using, these concepts apply.
Fleeing is Normal
We are not tough troops. Even our tough troops are only tough by comparison. When your T3 Elves get charged, the most likely thing you should be doing with them is fleeing. This is normal and OK, and they will most likely rally and be able to fight on in another turn.
Shooting Phase is a Big Deal
Use your (usually long range) Poison shooting to take out enemy war machines and monsters. Use Fireball and Pillar of Fire spells to take out enemy units. Everything else can be softening a unit to make it more breakable from a charge.
Always Charge Together
Generally, Wild Riders are going to do a lot of damage. Generally, your BSB will do a lot of damage. Same for a Dragon, and to a lesser extent a Treeman. However, they will sometimes whiff, it’s a game of dice. Charging with multiple units is a winning strategy, as it means you’re a) more likely to win the combat and b) more likely to outnumber the enemy and actually break them.
Pick Your Fights
Use your superior mobility to stay out of range of charges or out of arc, as best you can. Sacrifice smaller and cheaper units to a charge that then allows a decisive counter charge in the following turn. This game is won and lost in Deployment and the Movement phase, and we have arguably the most mobile army.
You must have at least one unit of Glade Guard in your army.
What’s Out
I don’t recommend Glade Riders or Eternal Guard for beginners because they are not easy to use. Glade Riders are 21 points a model (assuming you give them Reserve Move and Hagbane tips), but are only T3 with no save and thus die very easily. Eternal Guard have to be built around, and infantry blocks do not do well in the current Dragon dominated meta (especially T3 with a 5+).
However, Glade Riders are an option for a Wizard bunker, if you’d rather put your L4 on a horse than on a Warhawk. They’re also the preferred option for when you’re taking a Dragon. If you’re going down that path, then don’t use Dryads and only take the mandatory single Glade Guard unit.
What’s In
So, it’s Glade Guard, Deepwood Scouts and Dryads for Core.
Deploy your Glade Guard in a line, outside of enemy shooting/magic missile and charge range as much as possible. You have the range advantage, and you’re fishing for 6s mostly anyway when you shoot. Move forward only if you maintain all of the above … having more room behind you to retreat / flee when charged is a good thing. If in doubt, use Hagbane Tips. Arcane Bodkins are also reasonable as Glade Guard don’t move much.
Dryads are used to protect the Glade Guard. Ideally you put one unit on each flank (if you have more than one unit), or you put one flank of the Glade Guard line against some terrain (or a Treeman!) and the Dryads on the other flank.
Deepwood Scouts get deployed as needed and as the battlefield and opponent deployment allows. Try to get them into cover, keep them out of easy Magic Missile range (or line of sight) as that’s the real killer. Fire and flee is a good idea with these guys, so bring a musician as points allow. Hagbane Tips, always. Fire at War Machines and unridden Monsters as priority targets.
If you have the Glade Rider bunker, deploy them in or near your Woodland Ambush forest, and put the one unit of Glade Guard nearby. Those Glade Guard are sacrificial if needs be, to ensure your Wizard stays safely away from combat aggressors.
Mounts available to characters include Elven Steed, Great Eagle and Warhawk for everyone, Unicorn for the wizards, Great Stag for the warriors and finally the Forest Dragon for the Glade Lord only.
What’s In
The Treeman Ancient is a good purchase for the army, because the same model is used just as a regular Treeman. I recommend the TMA as the Level 4 spellcaster in small points games, after which it can move over to be a Treeman. The Treeman / TMA is probably the best anvil-style unit we have, and having a difficult to kill unit that’s worth a lot of points is good for beginners. Kitting out the TMA with an Annoyance of Netlings helps protect them in combat from pretty much everything scary (possibly not Dragons). I use Battle Magic. Order of preference: Fireball, Pillar of Fire, Arcane Urgency, Oaken Shield, Curse of Arrow Attraction, Curse of Cowardly Flight. I will always trade one of them for Hammerhand.
A L4 Spellweaver is essential at higher points levels, I recommend getting one on a Warhawk, with the Oaken Stave and Talisman of Protection. This is an easy to use piece, with 360° line of sight, meaning you only have to worry about range for casting spells. Evasive and Feigned Flight mean you can keep it safe pretty well–flee when charged, preferably over another unit! I prefer using Battle Magic here too, and in tandem with another L4 Battle Mage like the TMA, you can accomplish a lot in terms of mobility and firepower. Order of preference changes because Oaken Shield is useless to this model, and I usually trade out a spell for Tree Singing, which I use primarily to help prevent line of sight to vulnerable models.
And then we get to the GotH BSB. This is my favourite model in our army, and I play it in every list. The Helm of the Hunt (aka HotH – I shortened Great Weapon/Stag + HotH to GotH for ease of reference) goes on a Glade Captain BSB, who goes on a Great Stag with a Great Weapon, and the War Banner. You get 2 static combat res on a unit with 360° line of sight, M8, T4 and a 2+ armour save. Plus on the charge will do S5 impact hit, 4 S6 attacks at I8, 2 S5 attacks at I7 and a S5 stomp, which everything but the stomp at AP -2. Pair this model up with Wild Riders and you’ll get a lot of mileage out of them.
The L4 Spellweaver on an Elven Steed goes into Glade Riders, who effectively act as ablative wounds for the Spellweaver, and grant Reserve Move so she can move into range during the shooting phase and then reposition to between 24″ and 27″ for optimal dispel with the Oaken Stave. She doesn’t need the Talisman of Protection in the bunker, it gets used by the Glade Lord on the Dragon. Ruby Ring of Ruin is also good here. Again, fleeing if charged is probably the right move.
Glade Lord on a Dragon has a few kit out options, but the one I’m recommending is built for a balance between combat output and durability. Dragons want to be in combat Turn 2, to avoid being shot at by cannons or being charged by something with Monster Slaying. The Wood Elf Forest Dragon can’t stack a Regeneration save on top of the Ward Save like other Dragons can do, so you have to be a bit more careful about where you position it. Take the Talisman of Protection and the Spear of Twilight, and charge into infantry and cavalry. The Befuddlement of Mischiefs and Annoyance of Netlings are great particularly when you’re fighting characters. Try to keep the Dragon in combat particularly during your opponent’s turn.
What’s Out
Branchwraiths offer very little value in any list, at least at time of writing. Waystalkers are kind of a tax for taking Waywatchers and again are a bit fiddly to use as a beginner, given how many points they are with no real save to speak of. Shadowdancer is a model that needs to run with Wardancers, and Wardancers (as much as I love them and use them) are not easy to use, again due to low survivability vs points spent on them.
Special and Rare
Your choices in Special and Rare are:
Special
Deepwood Scouts
Wildwood Rangers
Wardancers
Sisters of the Thorn
Wild Riders
Warhawk Riders
Treekin
Rare
Treemen
Great Eagles
Waywatchers
What’s In
Sisters of the Thorn are probably the most points efficient unit in the game. 134 points for a 5 wound unit with Poisonous Attacks and 4++ ward save. M8 (with Swiftstride and Move & Shoot javelins), Fast Cavalry, Fire & Flee (with Quick Shot javelins) … Oh, and pick any spell from Battle Magic or Elementalism to cast as a Bound Spell at L2. You pick the spell at the start of the game, so I roll all my wizard spells first and see what they get before choosing the Sisters’ spells. This unit can be used to screen the Wild Riders and help prevent frenzy baiting, can go down a flank and take out Warmachines on their own, can support your scouts … literally anything, because they are so mobile. They’re not a first order combat unit, so only put them against small things and war machines, or in the flank of something to get some extra combat res. Use Arcane Urgency from your primary caster to help redeploy these units to where they need to go. In a pinch, you can move 48″ in a turn (if they are in Marching Column) so don’t be afraid to start the game in Marching Column.
Wild Riders ARE a first order combat unit, but need to be protected in order to reach combat. They’ve got a 5+ Armour Save (if you give them shields) and 6++ ward save, so they’re not completely vulnerable, but Pillar of Fire and Fireball are not their friends. When they charge (including counter charge) 3″ or more, it triggers their Furious Charge ability, which means that with Frenzy they are putting out 3 S5 AP -2 AB (1) attacks each, plus 1 S4 attack from the mount. Run them in a straight line to maximize the attacks (you get one from each of rider and mount in the fighting rank, even if not in base contact), and combo charge them with the GotH BSB/Dragon Lord. They are a bit tricky to use at first because of Frenzy, so if you’re just starting out and aren’t sure where to pay attention yet, this is where. Read the linked article which has some suggestions on what to do to prevent unwanted Frenzy charges.
The Treeman is a great anvil unit, and can easily protect a flank all on their own. They are more close combat oriented than the TMA, and can usually hold their own against pretty much any unit–stuff doing multiple wounds are probably the main exception. Use them to keep your Glade Guard and Wizard safe, claim objectives or in a late game combo charge. The Treeman also functions as a mini-General for your Dryads.
Likewise the Treekin just squeak into the Treeman list because a) I don’t think everyone wants to run two Treemen like I do, and b) they are a very durable unit. The Treeman list is about medium wins and conserving points, and Treekin definitely fit the bill here. They also excel against high armour save, low initiative models due to Tree Whack, but really they are just their to hold their own while you dogpile in with other models (preferably the GotH BSB and/or Wild Riders).
What’s Out
Warhawk Riders (too many points per model for something with no save), Wildwood Rangers (situationally useful, but ranked up infantry takes some getting used to), Wardancers (I use them all the time, but they are a defensive piece disguised as attack pieces and way too vulnerable), Waywatchers (akin to more expensive Deepwood Scouts), and sadly Great Eagles (T4/W3 with no armour save is just free points). Deepwood Scouts are taken in Core.
Just the Lists
Edit: updated link to Dragon 1,000 point list to correct destination
Wood Elves have a few choices of wizard, but this article really focuses on the virtually essential Level 4 Wizard, the Spellweaver, and a build that is easy to use in your army regardless of how you’ve built the rest of your list.
Fourhawk
It’s a level 4 wizard, on a Warhawk, geddit? I don’t take credit for the name, as it’s been kicking around on the web for a while (let me know if you know who coined it), but I’m using it because it seems appropriate! Here’s the build I’ve been using. There’s 30 points of magic items to spare, so you can also add Ruby Ring of Ruin if you don’t have a better place for it in your army.
Here’s what I wrote about the Oaken Stave in my Wild Riders article:
Bring the Oaken Stave (or Broaken Stave as it’s been nicknamed locally). This is our most potent Arcane item, on your L4 Spellweaver. I can’t overstate how good this item is. 27″ Dispel Range vs everyone else’s 24″, so you can stay out of range of their Dispel while still being able to Dispel them. Oh, and when you are Dispelling? Roll 3d6 and drop the lowest. It actually feels like cheating: it’s not, but the math is very good! Apparently the probability shows that 62.4% of the time 3d6 drop lowest is higher than 2d6, 27.6% of the time it’s lower, and the other 10% of the time it’s a tie which in the case of Dispelling means a loss. The odds of winning a straight up Dispel roll (my 2d6 beats your 2d6) is 44.4%, so it’s like you just got a 40% boost to your odds of winning that roll, which is why it feels like cheating 🙂 Yours for the low price of 40 points. (The downside is very mild: you must be within 3″ of a Forest.)
It’s hard to argue with this math, and you’ll definitely feel the benefit of the Stave on the battlefield. Place your Woodland Ambush forest within 12″ of the centre but close to the centre line of the battlefield, and you’ll have Dispel range over the whole battlefield except for maybe 15″ on one flank. You can often stay within 27″ of the enemy wizard while outside of 24″, given the high manoeuvrability of the Warhawk, thus giving you free reign to cast while still being able to dispel. However, even without that advantage, the dispel dice are definitely in your favour.
The Talisman of Protection gives you a 5++ save against the unexpected, stuff like Cannonballs that don’t actually target. Otherwise, you’re relying on the Evasive ability of the Warhawk to enable you to either flee behind another unit (e.g. some Dryads) or out of range, so that you end up not being a legal target. Often just telling your opponent the Warhawk is Evasive is enough for them not to try targeting you at all.
The Warhawk also gives you an extra point of toughness, and being a Monstrous Cavalry mount, you get that all-important 360° front arc for casting your spells, particularly useful for Magic Missiles, but it also applies to Enchantments and Hexes, so no need to worry about whether you can see that unit you want to cast Arcane Urgency on. You also get Feigned Flight along with Swiftstride, so if you are charged you can safely flee (over another unit preferably) and will have a high chance of getting out of charge range while automatically rallying once you do, thus being ready for your Conjuration sub-phase next turn. Finally, by causing Fear, your Fourhawk won’t have to take a Ld test when charged by a Terror causing unit (thanks to the recent FAQ!).
If you keep the Wizard near a unit of regular cavalry (e.g. Glade Riders or Sisters of the Thorn) then they can’t even be targeted by shooting attacks unless they are the closest model to the enemy.
Lore
Here’s a quick rundown of the four Lores available, and why you may or may not want to take each one. I’m listing them in my order of preference.
Battle Magic gives you Arcane Urgency, Fireball and Pillar of Fire, along with a couple of Curses that might be useful depending on your build and your opponent – I’ve had utility from both. You won’t want Hammerhand (or any assailments) with this build, and Oaken Shield is kinda useless (because you’ve already got a 5++) unless you also have Warhawk Riders, so I usually end up trading out for Treesinging. If unsure, take Battle Magic. It has low casting costs and pretty high utility, particularly as you’ll just be rolling for spells and not choosing (like you would if you had a Lore Familiar).
Elementalism gives you Plague of Rust, Wind Blast, Travel Mystical Pathway (remember it says ‘within 12″ of it’s original location’ not ‘wholly within 12″‘). Earthen Ramparts and Summon Elemental Spirit can be useful in some builds, depending on the rest of your army. The assailment is just bad, and this build doesn’t want assailments anyway. Storm Call is a bit meh as a signature spell, so again I’m usually trading out for Treesinging, but occasionally the -1 initiative is useful against certain foes (particularly if you’ve got a lot of Treewhacks in your army).
High Magic is higher casting values on average, so I wouldn’t recommend it for this build – it really wants an arcane item that boosts casting value (hopefully we’ll get a good one in the Arcane Journal!). However, if you’re feeling lucky, or don’t mind casting a bit less often, Fiery Convocation, Tempest, Fury of Khaine and Shield of Saphery are all good spells. Drain Magic is a bit of a nombo with the brOaken Stave, as it wants you to be within 24″ whereas the Stave allows you to be outside of 24″, so again, I’d be swapping out for Treesinging.
I don’t recommend Illusion for this build either, primarily because a lot of the spells don’t suit it well: Shimmering Dragon is a bit meh for Wood Elves because we tend to be very mobile anyway, Spectral Doppelganger requires a different load out, Glittering Robe isn’t a useful signature spell for an Evasive unit that doesn’t want to see combat, and Confounding Convocation and Mind Razor are both a bit meh. Miasmic Mirage can be game changing but is tough to cast on an 11+, and Column of Crystal is good but we can get a similar effect with Treesinging.
Summary
So, it’s pretty simple: stay near your forest, move around to get maximum value from the brOaken Stave, and generally dominate the magic phase. If I only take one wizard, this is the build. Have you been taking your L4 on a Warhawk? If so, do you build them differently? What’s your experience been like with them? Let me know in the comments, or on our Discord!
The final rank and file unit for the Wood Elves are relative newcomers, having first appeared in 8th edition, just a few months before the End Times. Wildwood Rangers have cool hoods, big weapons and no fear.
Stats and Special Rules
Wildwood Rangers have exactly the same statline as Eternal Guard, with a base cost of 14pts, which is 1pt more than their spear-wielding brethren. Much like the Eternal Guard, they come with light armour as base (you can buy shields for 1pt per model), and they are Close Order and come with Elven Reflexes and Move Through Cover. You can purchase full command for 6 points each (compared to 5 for Eternal Guard) and the champion and standard bearer each have 50 points to spend on magic items/banners.
Where things start to diverge is with the last two special rules and their weaponry. The Rangers are armed with the “Ranger’s Glaive”, which Requires Two Hands (making the shields only useful vs shooting attacks), but gives S+2 and AP -2. Note that unlike a Great Weapon it does not have Armour Bane (1) nor does it Strike Last. At base Initiative 4 (or 5 when Elven Reflexes kick in), it’s likely that you’re going first against a lot of enemies.
Rangers are Immune to Psychology, which makes sense when combined with their unique special rule: Guardians of the Wildwood. This rule gives them +1 Attack and Multiple Wounds (2) when in base contact with a model that causes Fear or Terror. Note that it explicitly states base contact, so you’ll have to roll two sets of dice if your unit is wider than what you’re attacking, to account for those supporting attacks that don’t do Multiple Wounds.
Battlefield Role
Part of the reason I left this unit to last is because I actually think they have a very limited battlefield role. At S5, they are not good against the big ridden monsters that are dominating the meta (looking at you, Dragons) as they are all T6. I really want them to be, but the math just doesn’t work out. Even assuming the Dragon Rider has foolishly allowed you a charge in the flank, where you can get 6 models in base contact with the 100mm of the base, you won’t do enough damage to really hurt it. (Against a Dragon Rider with a 3+/5++, you’ll do on average 1.78 wounds, assuming 12 attacks with multiple wounds 2, which really means you’ll either do 0 or 2. The Dragon and Rider (assuming wielding a GW), will do 5.58 wounds, not counting stomps …).
So, you’re really looking at smaller monsters or monstrous creatures, monstrous infantry / cavalry, or Undead. This means that against some armies, you’re just not doing much (e.g. most of the Forces of Fantasy), but against others you’ll do pretty well (e.g. Tomb Kings). Once I start getting into situationally good units, it turns them into a narrative / fluff choice rather than a competitive one. It could be argued that they’d still have S5 vs say Dwarfs, which is fine. But you’re still T3 with a 5+ AS at best, which means you’re an excellent shooting target (albeit one that won’t panic at any point).
Let’s take a look at how they do against some of these more ideal targets. One monster I see a lot of is the Chimera: it’s fast, and it’s pretty effective against T3 infantry, so it’s something that a Warriors player might well take vs Wood Elves. At I3 and Fly (10), it’s likely that the Chimera will get the charge, but let’s assume you’ve screened the Rangers well with Dryads, and now you’ve got the charge and get to attack first. You’ll get max 3 in base contact (front/rear) or 6 (flank). In the flank, you’ll average 5.33 wounds (assuming it has 5+ Regen, which they typically do) which will kill it. In the front, it’s half that, which means you’ll either do 2 or 4 wounds … the latter kills it. Likely you’ll get it either way, so that’s not bad? Getting the charge will be tricky though. The Chimera, if it survives, will likely do ~4 wounds back (maybe more if it also has a Fiend Tail), so if you don’t kill it, you’re still probably winning combat, assuming you have a banner …
Another common threat from Warriors are Dragon Ogres. Vs them you’ll likely go first because they usually have Great Weapons. They are 50mm wide, so it’s easy to get your whole front rank into base contact. Let’s assume the maximum amount of models in base contact which would be 8. It’s more likely it’d be 6, so I’ll look at that too. 16 attacks results in 9.5 wounds on average (vs T4, 3+ AS) so you’ll kill 2 and take the attacks back from the third. It’s about 7 wounds on average for 12 attacks (6 models in the front rank) so you may end up only killing 1 Dragon Ogre and taking attacks back from 2. Each Dragon Ogre will average 3 wounds back (the 2 stomps are the real killers), so you may still win combat – definitely not a sure thing.
So what about vs Tomb Kings? Vs 3 Ushabti, assuming you can maximize frontage to 7 models, you will wreck face. 10 unsaved wounds before they’ve even had a chance to loosen those Ritual Blades. The big difference here is T4 (vs T5 of the Chimera) and only having heavy armour (which your AP -2 deletes).
In fact, if you start to math it out, the right targets for Wildwood Rangers are Fear causing models that have multiple wounds and a 4+ AS or worse, and ideally no regen/ward save (although a 6+ is fine). Against anything else, they’re taking too much damage back for not enough damage output.
This leads me to the conclusion that a big block of them is only really useful if you know in advance that you’re facing a lot of monstrous infantry (who tend to fit that profile). Not great in a take-on-all-comers list.
The 5-pack
I actually think the right way to take these guys in all-comers list is the same way as you should take all our other infantry (except Eternal Guard) which is in small units. 5-7 models max, and just run them one rank wide. No champion, no upgrades, keep them cheap and treat them like specialist chaff. 70 points for 5 is not bad for what they can do, and they’ll be situationally excellent, and you could go up to 7 and still be (just!) under 100 points.
You could also put the Ruby Ring on a champion in this unit, which is not amazing but it’s an option. The range on the Ring means they don’t have to move super fast to be useful with it.
However, I think I’d run them more in the backfield, protecting the units of Glade Guard that are trying to weaken your opponent with repeated archery shots. If you’ve got 10 models because you bought a box, put 5 on each side of your archer battle line, along with 5 Dryads, and you’ll have enough chaff to prevent enemies from just casually eating your archers for several turns and possibly the whole battle. Of course, I like to also keep a Treeman nearby …
Final Thoughts
I want this unit to be better than they are. All the evidence I’ve had of them being good has been anecdotal or situational (“Oh, they wrecked this unit in my game vs Vampire Counts”). From an optimal tournament choice, they’re low on the list. If you love the models, run 1-2 small units of them (heck, even run 3-4) to help prevent losing too many points at once and to give you the best chances of getting into base contact with those prime Monstrous Infantry targets.
I’m building mine some as Eternal Guard and some as Rangers, and putting the EG at the front of the unit when I want a big block of Guard.
How are you using yours? Had much success at a tournament with them? Any character builds that really maximize their utility? I’ve not found any, but I’d love to hear from other folks about their experiences.
Flying cavaly units are pretty rare in Warhammer: The Old World, and the Warhawk Riders are definitely the fastest and most mobile. But even in army that’s all about mobility, do they have what it takes to make them effective?
Continuing my series on Wood Elf units, in this article I take a look at the Warhawk Riders and try to answer that question.
Stats and Special Rules
Warhawk Riders are the only Monstrous Cavalry rank and file unit in the army, and come on a 50x50mm base (which is bumped from previous editions when they ran on 40x40mm), the same size base as their larger cousins, the Great Eagles. Also like the Eagles, they have T4 but sadly only 2 Wounds (compared to the Eagle’s 3). Other than that, the Rider statline is the same as for a Glade Rider, and like the Glade Rider comes equipped with both Asrai Longbow and Cavalry Spear. The hawk itself gets 2 attacks at WS3 and S4 AP -2, which is not bad.
For Special Rules, the Warhawks come with everything you’d expect from flying Elven cavalry: Elven Reflexes (which only applies to riders), Fly (10), Skirmishers and Swiftstride. There’s also a few extra rules that start to flesh out what their intended role in the army is meant to be. Oddly, like the Glade Riders, they don’t get Move Through Cover.
Feigned Flight, Fire & Flee and Evasive combined with their ability to take enchanted arrows for their Asrai Longbows all lean toward this unit being a ranged threat (although the 8pt champion upgrade gets both +1 BS and +1 A–more on this later). However, at 44pts per model, plus 2 points for e.g. Hagbane tips, you’re paying 138 points for a minimum unit size of 3 which has just 6 wounds total. Having Evasive helps protect the unit from missile fire, because even though they have T4, they have no saves whatsoever, which makes them a prime target for your opponent’s ranged attacks.
The unit can’t have a banner or a musician, but with Feigned Flight giving an automatic rally when you Fire & Flee, this isn’t such a big deal. The champion can take a magic item up to 25 points, which might potentially be an Obsidian Lodestone, but I suspect the fewer points invested in the unit the better, given their likelihood to die.
The final special rule is Fear, which I’ll cover next as we discuss their role on the battlefield.
Battlefield Role
With only 3 shots in the unit, the ranged damage output on this unit is minimal. Compared to 138 points of Deepwood Scouts (9 models with Hagbane tips), you’re getting one third of the shooting power. So, how would I use Warhawks?
I think their potential use is to help huntdown War Machines and solo Wizards in the backfield. Getting into combat on T2 after a 20″ march down the extreme flank is pretty essential if you want to avoid them getting shot or magic missiled to death. Causing Fear means that they’ll ignore the Fear caused by e.g. Liche Priests and potentially even get the drop on some cowardly war machine crew. Against a lone wizard, you’ll get two models into base contact, both doing 3 S4 attacks, likely hitting 3 times and maybe getting one wound in, which might be enough to win the combat. If you’re able to cause Fear, the odds of surviving go up.
However, it’s hard to recommend them for this role, because of their lack of survivability. It’s just as likely that the wizard or war machine will shoot them off before they get into combat, and most assailment spells will likely do more wounds than the Warhawks will in close combat – the hawk being only WS3 makes hitting a lot less consistent than I would like. Deepwood Scouts are both a Core choice and are definitely better at war machine hunting. But maybe there’s something to this Wizard hunting thing, particularly as I see more and more players deploying their wizards beside the bunker rather than in it …
Wizard Hunting
What if I put a combat character on a Warhawk into a unit with them? That would certainly make them more likely to kill Wizards, and it would give some shooting protection to the character in the form of warm bodies to soak up the damage. This is maybe a niche use for them, but you’d be then committing somewhere between 250 and 350 points into that unit … increasing the likelihood that they become a primary target for your opponent which is not great when they have no saves. A Glade Captain on a Warhawk is 100 points base, or 104 if you give her a Great Weapon, and that could potentially do a decent amount of damage in hunting an enemy Wizard. Taking a BSB with the War Banner, you could now get 2 base combat res, cancelling out some static res of your opponent’s. Give the BSB a Giant Blade for some extra oomph …
I’ve considered them also as a bunker for a Warhawk riding Spellweaver, but my ‘Weaver ends up being great at dodging enemy fire anyways, and you’d need a unit of at least 5 Warhawks to actually give the benefit of a Look Out, Sir! roll … spending 132 points for a meat shield seems like it would be better spent on a Glade Riders unit with Reserve Move (110 points for 5 with Hagbane Tips). But let’s explore it a bit further. If the Wizard has High Magic, he could at least make them Ethereal from Walk Between Worlds, which would protect the unit for a lot longer, and Drain Magic would make them harder to nuke off the board with a Ruby Ring. Shield of Saphery could offer a further 5+ Ward Save if the enemy had a lot of magical attacks that would cancel out Ethereal, and Fury of Khaine would give each model 2 more attacks (one each for rider and mount) in close combat. So now you have a unit that can pump out 20 attacks from 4 models and take zero damage back, assuming the enemy has no magical attacks. They can get way in the backfield and harrass whatever they like, from pretty much any angle because Skirmisher gives them a 360° charge arc. The wizard build might be: L4, High Magic, Warhawk, Lore Familiar, Talismanic Tattoos, Ruby Ring of Ruin and optionally Spealleater Axe for an extra MR -2, coming in at 325. Add 4 Warhawks in at 176, and you have a 500 point unit that is very difficult to kill, can easily hunt down enemy wizards or war machines and protects your L4. It’s not optimal, but it is at least viable.
You could put both the BSB and the Wizard into the unit, and now you have a 700+ point unit that will be really hard to kill and that can dish out some decent combat damage, be in combat virtually anywhere on the battlefield by T2, and can likely win any non magical combat, and most likely kill a wizard before they have a chance to strike back. But that’s the rub: a lot of armies have access to magical attacks (e.g. most of Warriors of Chaos, Chaos Dwarfs, Daemons, heck even our own Forest Spirits) and of course all the magic missiles. So this is definitely risky tactic to use. Fun though!
Conclusions
When comparing Warhak Riders points-wise with other units, it’s hard to justify them on the battlefield at all. Sisters of the Thorn cost the same for a minimum unit plus champion and standard, and will put out more shooting potential, more battlefield threat (with their bound spell) and survive longer having only 1 wound less (5) but protected with a 4+ ward. And the Great Eagle does a lot of the same job but for half the points, while also doubling as chaff.
So sadly, Warhawk Riders are really only likely fielded in a general purpose “take on all-comers” list for one reason: because you like the models and want to play with them (aka The Rule of Cool). Any role they have on the tabletop is probably better filled by a different unit: Deepwood Scouts or Great Eagles for War Machine hunting, or Glade Riders as a Wizard Bunker. The one niche might be for hunting wizards with the help of High Magic Spellweaver, but unless I’m taking two L4s, I prefer my Spellweaver on her own Warhawk, with the brOaken Stave, Talisman of Protection wielding Battle Magic.
Maybe the Arcane Journal will gift us something to make the Warhawk Riders a bit more appealing. Or maybe I’m missing something that you’ve found? Let me know your thoughts in the comments, or on our Discord!
In all the Old World discussions on Discord, people have been posting screenshots of rules, and links to the WHFB rules site as they’ve been trying to learn all the different rules and their interactions.
I teamed up with the developer of that site to create a bot: TheOWL (Old World Lawyer). Ask the Owl about any rule, spell, magic item or unit and it will do its best to find what you’re looking for and post a link right into the Discord channel for you.
If you’d like to invite TheOWL to your server, just click this link!
If you’ve any feedback or notice a bug, just hit me up in the comments below.
A relative newcomer to the Wood Elf list, Sisters of the Thorn were added for the first time with the 8th edition army book, the last army book before The End Times and the death of rank and flank Warhammer. As such, they don’t have the same nostalgia or model count that most of our other units have. Let’s take a closer look at these Handmaidens of Ariel …
Stats and Special Rules
Sisters have a standard Wood Elf statline, with a couple of improvements which immediately help us understand their role on the battlefield. They are BS5 (6 for the champion) and Ld9, so they seem to want to be used as a ranged unit, and likely on a flank or away from the General’s Inspiring Presence. Being a cavalry unit, they are actually a bit slower than the rest of our cav at only M8, but the Steed of Isha gives a nice extra S4 attack if you do end up in combat.
They’re equipped with their own special Blackbriar Javelins, S3 range 12″ AP -1 with Move & Shoot (so you can march and still shoot) and Quick Shot (meaning you can Stand and Shoot no matter how close the charging unit is). They also have Fire & Flee, but I want to call out that right now Quick Shot and Fire & Flee do not work together (seems illogical, but that’s how the rules are written. Edit: some groups are FAQing that these do work together, so check with your opponent/TO) so keep that in mind when you’re playing with them. They come with Swiftstride, Open Order and Fast Cavalry, so you get the free pivot even if you march … we can start to see this all coming together now. March 16″, pivot up to 90° and then shoot up to 12″ away with the javelins.
Like the rest of the army, they have Move Through Cover and Elven Reflexes, which are both very useful, but what really sets them apart are these last three rules: Poisoned Attacks, Daughters of Eternity and Deepwood Coven.
Poisoned Attacks is a rule on the model, not the weaponry, which means that it applies to both ranged attacks and close combat attacks AND it applies to the attacks of both rider and mount when in combat. This fits in with a wider poison attack strategy by equipping your archers with Hagbane Tips, and the extra -1 AP from the javelins definitely comes in handy: it doubles the number of wounds that go through vs something with a 5+ save (a common save on high toughness monsters, who are great targets for poison shooting).
Daughters of Eternity is a simple but awesome rule: all the models have a 4++ ward save. Very few models in the game have or can get a ward save like this, and it really helps keep the Sisters alive given that they don’t wear armour. But the real kicker is in the wording of the rule “This unit has a 4+ Ward save against any wounds suffered.” Not this model, or models with this special rule … this unit. That means that when a character joins the unit, they also get the 4+ Ward save! I’ll go into this a bit more when I talk about their battlefield role, but it opens up a ton of interesting possibilities for potential character builds and the role the unit can play.
Caveat: some folks have argued this doesn’t apply to characters. I’ve yet to hear a solid argument as to why (most of them seem to be “Oh but if you look at this other similar-but-not-quite-the-same rule / FAQ” which doesn’t really hold water with me). In the spirit of fun and fair play, find out from your TO or opponent what their thoughts are before assuming it’s OK.
Deepwood Coven is the last rule on the unit and grants the unit the ability to cast a Bound Spell from either Battle Magic or Elementalism, at L2 if you have both a champion and standard, or L1 if you have just a champion, L0 if you have neither. It would have been nice for this to be L3 if you had full command, no? And sadly no access to Lore of Athel Loren, because I think Treesinging might have suited this unit. Ah well. This is still a pretty nice ability. However, as L2, your odds of casting the spell aren’t great. Here’s a graph showing the odds of rolling any given total on 2d6.
Odds of rolling at least # on 2d6 source: anydice.com
The lowest casting cost spells are 7+, and the highest are 10+, meaning you need between 5+ and 8+ on the dice. Not too bad, until you consider the odds of being dispelled. I have a simple spreadsheet you can use to see the odds of casting vs L4, and the chances drop dramatically …
Casting Value is on the y-axis, and chance to cast is on the x-axis.
The best chance is a 7+ spell, which will go off roughly 1/3 of the time, or twice per game, vs 10+ spell which will only go off 1/4 of the time, or 3 times every 2 games. This assumes they are in range of an opponent’s L4 for dispel, but as I said earlier, it’s likely that the best place for these ladies is on a flank and away from the your opponent’s main force. Let’s take a look at the spells that might be good options. I’m recommending you take both a Standard and a Champion for that +2 to cast, in case that wasn’t obvious!
Edit: one final critical note that I failed to mention. This spell is chosen before deployment, not in the list building phase. So you can pick what you want based on what your opponent’s army is, rather than having to guess up front!
Spells
TL;DR pick from Fireball or Plague of Rust
Cast on a 7+
TL;DR nothing amazing in the 7+ spells.
The four options are Hammerhand, Curse of Arrow Attraction, Oaken Shield, and Storm Call. Obviously Oaken Shield is completely pointless, so don’t take it! Storm Call is, imho, a really weak spell and should really never be cast, so recommend you don’t take that either. That leaves either Hammerhand or Curse of Arrow Attraction. Broadly speaking, this unit could be either a combat-oriented unit, or a shooting-oriented unit and so I could see a case being made for either of these two spells to reinforce that orientation. However, I don’t think Hammerhand really does enough damage to make it a good choice (it’ll average 4 hits per combat, which likely will only translate into 1 wound against most units). Curse is OK if you have a lot of other shooting in the list, and your other wizard(s) aren’t running Battle Magic. I’ve generally found it translates into roughly one extra wound from ~30 poison shots (which is what I’m typically running).
Cast on an 8+
TL;DR if in doubt, choose Fireball.
The chart shows that the odds of casting an 8+ are only marginally worse than the 7+ vs an L4 dispel. The odds of the spell going off at all are ~72% (6+ on the dice). The three options here are Fireball, Flaming Sword and Wind Blast. I think Flaming Sword is not as good as Hammerhand, and so definitely can’t recommend it. That leaves either Fireball or Wind Blast. Fireball is probably the gold standard of magic missiles: it’s a very solid spell, and given that every list seems to run the Ruby Ring of You-win, choosing this on a Sisters unit as a bound spell is like getting an extra Ruby Ring. Wind Blast is also a pretty good magic missile–you average 5 hits at S5 AP -1, which is likely to do more damage against certain targets than Fireball, and you also push them away from the Sisters by 2″, which is situationally good: preventing an opponent from being able to make a charge for instance. I think this one requires a bit more finesse to make work, but definitely a solid option. Again, either of these spells is reinforcing the ‘shooting-oriented’ option for the unit.
Cast on a 9+
TL;DR take Plague of Rust if you’re up against units with 2+/3+ Armour. Take Pillar of Fire if your opponent has lots of units of Low toughness units.
The odds have now dropped to about 3 in 10 vs an L4, which is not a big enough drop to really be concerned about. The odds of the spell going off at all have dropped by ~14% to ~58%, so still being cast more often than not. My personal opinion here is that this is probably the highest spell casting cost to shoot for with a L2 spell, as after this you drop below a 50/50 shot for casting at all. So, what are the spell options?
Battle Magic offers us Pillar of Fire and Curse of Cowardly Flight, while Elementalism has Plague of Rust and Summon Elemental Spirit. Of the two Vortex spells, I think Pillar of Fire is stronger because you can control the direction, and the AP is higher even though the Strength is lower (S3 AP -2, vs S4 AP -1). Even though Remains in Play spells are pretty easy to Dispel, having this unit be out on a flank and casting centrally may make this easier to go off and do some damage, or even roll into enemy War Machines. Remember that the enemy wizard has to be in range of the caster to Dispel, not the vortex itself. Pillar is great against units with low saves and toughness (um, Wood Elves?), including things like Goblins, Witch Elves, most human infantry, and most light cavalry.
Curse of Cowardly Flight is an underrated spell. When we did our Magic Lore review, I was very down on this spell but having now used it multiple times in battle, I’ve discovered it’s main strength which is on lone monsters. These tend to have high movement but low Ld, and are often used to try to hassle your back lines. It’s got a pretty low range though (15″) so I think it doesn’t combo well with the Sisters, who most likely want to be further up field and pressing the enemy battleline.
But really, I think the spell to choose from the 9+ spells is Plague of Rust. Whether you are shooting- or combat-oriented, this spell is arguably the best debuff we have available to the army, granting a very important AP -2. Wild Riders, Great Weapons and Arcane Bodkins also have AP -2 and AB (1), meaning that a unit with Plague of Rust cast on them is losing their armour save against our preferred attacks (or dropping it to a 6+ vs those very well armoured 2+ units). Even the Sisters themselves can benefit from it, because Poisoned Attacks at AP -3 are likely to get some wounds through on pretty much any target. It also has an excellent range at 21″, again reinforcing this notion that the right usage for the Sisters is on the flank, providing ranged support.
Cast on a 10+
TL;DR don’t take any of these, they’re too hard to cast
The math definitely works against the 10+ spells. You need an 8+ on the dice (~42%) even just to cast the spell, never mind it being dispelled. However, for the sake of completeness, here’s my thoughts on what’s available.
Earthen Ramparts, Travel Mystical Pathway and Arcane Urgency are the 10+ spells. Of the two conveyance spells, I think Arcane Urgency is the stronger, but neither are very good for the Sisters themselves because they are pretty fast moving on their own (I’ve written before about this being great for Eternal Guard though). However, I think that conveyance spells are best when you can rely upon them, which means it’s something for your L4 to do.
Earthen Ramparts is a so-so spell, giving a 5+ Ward to another unit in exchange for it’s ability to move. I think the best target for this spell is a unit of Treekin or a Treeman, who then become very hard to wound and can function well as an anvil or flank defenders. Sisters are likely to be functioning on a different part of the battlefield than the Trees though, so I think it’s a suboptimal choice. Again, I think this is the sort of spell you want to get off reliably if you’re going to put those units into that role, so take it on your L4.
Battlefield Role
I’ve alluded to their being two primary roles for the Sisters, either as a shooting-oriented unit, or a combat-oriented one. Let’s tackle combat first, as I think it’s the less obvious choice.
Combat Oriented
In combat, the Sisters are reasonably solid on their own. Their damage output is limited, even though it can be buffed with their Bound Spell and benefits from Poisoned Attacks, but they do get two attacks per model in the fighting rank, and they are at AP -1 for the Sisters attacks. Versus Chaos Warriors (a decent benchmark) they’d do ~2 wounds on average, and ~3.5W if you cast Plague of Rust. Clearly, they’re not a front-line combat unit, so on their own they are best at attacking your enemy’s chaff and war machines, or providing some flank support in a combo charge. I think the main use for them in a combat role would be to deliver a combat character into base contact with the enemy, and provide them with a 4++ Ward save from the Daughters of Eternity special rule.
This sort of combat character is probably best being a Glade Captain, rather than a Glade Lord, simply because the types of targets they’ll be good at taking out are going to be the enemy cavalry or infantry, not enemy monster-riding Lords. Any build that you might put together to take out e.g. a Lord on a Dragon is unlikely to kill them in a single turn, and even with a 4++ Ward save is going to result in you most likely dying to attacks back and Thunderstomps. (The best build I could come up with was with the Ogre Blade, Potion of Strength, Befuddlement of Mischiefs and Annoyance of Netlings – you’re likely going first and doing some wounds, but on average not the 9 you’d need to kill the Lord. Even though you’re being hit back on 5s, you’re still likely taking 3 wounds total from attacks back and Thunderstomps).
This kind of unit is probably useful in support of some Wild Riders. You could put the BSB into this unit, to provide some useful static combat resolution and damage output in a combo-charge with Wild Riders, but I think the GotH BSB does this better and provides more options.
There is a possibility of making a cavalry deathstar here … BSB, Lord and Spellweaver all on Elven Steeds, keeping the Weaver in the 2nd rank because the front rank is the two combat characters and the command group. The Lord could take a similar build as above, the BSB could have the War Banner, and the Spellweaver could take the Lore Familiar. You could get up to +5 static combat res (+1 for rank, +1 BSB, +1 Standard, +1 War Banner, +1 Banner of the Eternal Queen), and take Lore of Illusion for Glittering Robe, meaning you’re most likely only being hit on 6s when combined with the Netlings and Mischiefs. (Spectral Doppelganger might be an option, with the Dragon Slaying Sword). Against a Dragon Lord, your Glade Lord would have a good chance to survive (likely only taking damage from stomps) and you could win on static combat res and force the Break Test into a Flee result due to outnumbering the Dragon on Unit Strength (you’d have 20, vs their 9). Not sure how good an idea this is, but it sounds intriguing–let me know if you’ve tried this! I’d definitely want to put some Magic Resistance into the unit too. Even if it didn’t do well, it’d be really fun to try it out! I calculate it out to be over 800 points though 🤣
(High Magic might also be a fun lore with them, because then they go from 2 attacks each to 4 attacks each with the Fury of Khaine spell. However, I think that spell is better at targeting Wild Riders, and doesn’t offer a lot more to help compared to Illusion.)
Shooting Oriented
I think this is the natural place for Sisters, as I think should be clear from everything you’ve read so far. They can take a spell that either makes your shooting better (e.g. Plague of Rust) or does more ranged damage (e.g. Fireball), fitting into the general Wood Elf strategy of softening up the enemy with shooting, staying out of range/charge arc, before finally attacking late game.
In terms of characters that could bunker well, in this unit, I think there are two main options: a Glade Lord with the Bow of Loren and Potion of Strength, or a Spellweaver running a good ranged Lore.
The Glade Lord with the Bow of Loren and Potion of Strength can pump out shots at up to S7. It almost doesn’t matter what enchanted arrows they take because they only get to use one (thanks to the very dumb FAQ, GW has decided that Wood Elf characters carry two quivers of different arrows into battle), so I think the right choice is Swiftshiver Shards to give an extra shot. You’ll get 5 shots at BS7, potentially S7, and if combined with Plague of Rust from the Sisters, will be at AP -2, AB (1). Not bad for plinking a few wounds off of pesky monsters, but probably not worth the points (it’s ~200) and there are better Lord builds (most notably, bringing one on a Dragon).
The Spellweaver I’d bring would probably be taking Lore of Illusion and a Lore Familiar, with the goal of stopping the advances of the enemy with Miasmic Mirage and Column of Crystal, and protecting herself and her sisters with Glittering Robe and probably Spectral Doppelganger and a simple magic weapon for being able to thwack chaff units in combat when needed. I’d argue that this same build is probably just as good in Glade Riders with Reserve Move, and that the Riders would chew up some of your Core allowance.
Having said all that, I think running Sisters on their own is probably the most viable option. Units of 5 will be annoying to deal with, and they’ll still be a L2 wizard until the champion is left standing on her own.
Summary
I think the Sisters are a very strong all-rounder unit for the army. They have a lot of flexibility, provide ranged attacks and magical support, plus defense for bunkering a character. They are comparatively hard to kill due to the 4++ save, and give an option for being able to choose a good spell like Fireball or Plague of Rust without having to roll for it. And they can pump out a few wounds in virtually any combat they get into, due to their volume of Poisoned Attacks.
What do you think of them? Have you had much success with them? What spells are you taking, and are you bunkering characters or just running them solo?
Glam, the laughing warrior–the original Wardancer (painted by Curmudgeonthrope)
When I first got the box of Skarloc’s Wood Elf archers, my instant favourite model was Glam. Here was this crazy guy who literally danced his way up and down the front line of battle and stabbed anyone who got too close. Armour? Pah! Armour is for slow people who can’t dodge.
I still have the command group from that box of archers, but sadly Glam went missing over the course of many years. However, my love of Wardancers did not diminish, and I’ve been running a small unit of them in my army on a regular basis. Let’s jump right in and take a look at their key characteristics.
Stats and Special Rules
Wardancers are one of a very small number of rank and file units who come with a base Weapon Skill of 6, which is equal to or higher than most characters! (The only other WS6 units I can think of are Grail Knights, Swordmasters of Hoeth … let me know if I missed any?). Aside from also having Initiative 6 (which will rarely come into play), they have the standard Wood Elf statline (which means they are both S3 and T3, which I’ll get to more later) and cost 16 points per model. In terms of formation, they can are both Open Order and Skirmisher, and like all other Wood Elves, they have Move Through Cover.
I6 will rarely come into play because Wardancers all have Strike First. What I’ve come to realize is that in this edition, Strike First is very strong and functions as an excellent deterrent against being charged–very few units will be at I10 when they charge, so Wardancers will almost always get to, uh, strike first and kill some of the incoming threat before they even get to attack. If given a choice, I’ve noticed my opponents all prefer to charge into something else (more on this later). Other special rules which help with survivability are Evasive (remember, this can be used against Magic Missiles!) and Talismanic Tattoos (a 6++ ward save).
Wardancers come with Motley Crew, something I’ve used only once because I was tight on points. You can equip Wardancers with either an Additional Hand Weapon for +1pt per model, or Throwing Spears for free. Contrary to what you might think, Throwing Spears are not missile weapons–you get to Fight in an Extra Rank on a turn you charged, and that’s it. If you’re taking a larger unit of Wardancers and/or running them as a ranked unit in Open Order, this may be marginally useful, but in general I’m taking Additional Hand Weapon every time for the extra attack (sadly, despite the models existing, Wardancers cannot take Great Weapons).
They also have Loner and Immune to Psychology, with the former meaning they can only be joined by Shadowdancer characters, and the latter mostly being beneficial but meaning they can’t flee as a charge reaction so you need to keep that in mind.
Lastly, but certainly not leastly, they have both Furious Charge to give an extra attack when charging 3″ or more and Dances of Loec which give them a number of different benefits in close combat. I’ll cover the Dances in more detail in the next section.
Tactics
The first thing to consider with Wardancers is their vulnerability. Outside of combat, they are very squishy at T3 with no Armour Save, and just a 6++ ward to save them. As with all squishy things, there are two broad schools of thought: take lots of them, or hide them. At 17pts each (including the extra hand weapon), taking lots in a single unit is a high risk strategy. It also doesn’t really do much for you by way of combat results unless you run them Open Order and try to get a rank bonus … even then, I think you’d get better combat results from having two smaller units that combo charged. So, my preferred option is to take them in small units, and try to protect them.
If you’re running them as Skirmishers, oponents will be at -1 to shoot at them with BS shooting. They definitely want to be accompanied by another unit and the prime candidate here are Dryads, who are the same speed but tougher, cheaper and Stubborn. As I mentioned, opponents will prefer to charge something else and Dryads are perfect for both taking a charge and providing that shield against shooting. When the Dryads Fall Back, they can provide that excellent flank charge for Wardancers. One thing I’ve done is position Wardancers right behind Dryads so there’s just no way to target the Elves directly even with Magic Missiles, although this is tricky. The best defence against Magic Missiles is the Oaken Stave, as I’ve written about before.
Remember also that they are Evasive, so you can even flee from a shooting attack through another unit and not cause panic (a benefit of being skirmishers) and end up on the other side and thus not be targetable at all.
So, assuming you’ve kept them alive and they’ve been able to get into combat, what’s happening now? Now it’s time to dance, baby!
Dances of Loec
There are four Dances of Loec to choose from. Who’s Loec? He’s the Elven trickster god–in my mind, he’s the love child of Loki and Michael Flatley–and his worshippers tell stories with, yep, cool dances. Give the cast of Riverdance some swords, I tell ya …
Anyhoo, back in the Old World: you have four dances to choose from. Each one grants a specific bonus in combat, and you must choose one in each combat for them all to follow (including any Shadowdancer that’s joined the unit–more on DJ Shadowdancer later). Unlike in previous editions, you can choose the same dance every combat if you like–there’s no requirement to change dance between combats. In brief, there are two dances that are more defensive, and two that are more offensive:
Whirling Death: AP -2
Shadows Coil: 4++ ward save
Storm of Blades: +1 Attack
Woven Mist: Enemies get -1 to hit
I’ve listed them here in order of how likely you are to use them, but I’ll go through the offensive ones first and then the defensive ones and I’ll try to give rules of thumb for using each one.
Storm of Blades
To kick us off, against 6+ or no armour save, use Storm of Blades, because getting an extra attack is great–hitting and killing more things is what combat is all about! It means that when charging, you have 4 attacks: 1 base, 1 for Additional Hand Weapon, 1 for Furious Charge and 1 for Storm of Blades. 5 Wardancers with a champion thus puts out 21 attacks!
I don’t have a lot extra to say about it – extra attacks kind of speak for themselves. However, they are only S3 attacks, so their effectiveness really depends on your targets.
Whirling Death
Whirling Death is probably the one I’ll use most often, but it really depends on the armour save of the unit I’m attacking. TL;DR: use Whirling Death if the Armour Save is 5+ or better. However, if you want to see the math read on…
To keep the numbers easy to read, let’s assume I have a unit of 9 Wardancers who have not charged (so they have 2 attacks each). Storm of Blades thus gives me 9 extra attacks for a total of 27, which I’ll be (usually) hitting on 3s, resulting in an average of 18 hits. If I’m wounding on 4s (because my opponent is T3), that’s an average of 9 wounds. If my opponent has a 5+ save, then 3 wounds will be saved, resulting in 6 wounds. If instead of the Storm of Blades, I choose Whirling Death I’ll have the base 18 attacks, of which 12 will get through. Of those 12 hits, 6 will be wounds and there will be no save, so still 6 wounds. Where the math changes is when it’s not a 5+ save. If it’s a 6+ save or higher, I’m doing more wounds with the extra attacks, so stick with Storm of Blades. If it’s a 4+ save or lower, the Whirling Death will get more wounds through the armour. If our example above was against a unit with a 3+ save (like most Knights have), Storm of Blades would get only 3 wounds past the Armour on average, whereas Whirling Death would do 4. When the save is exactly 5+, I’m still recommending Whirling Death over Storm of Blades because there’s a marginal benefit for it if you also have a champion in the unit–that extra attack changes the math!
For the full spreadsheet, if you’re a data nerd like me, take a look here. Bear in mind that it’s hard to get all Wardancers into the Fighting Rank.
The Shadow’s Coil
Still with me? Great! Let’s talk about the more defensive dances. Sometimes you’re not one doing the charging, maybe because your opponent has caught you off-guard or with a sneaky overrun. This happens (to me) more frequently with cavalry, and cavalry usually get all their best damage results on the first round of combat. So, when charged by heavy cavalry or anything you’ll struggle to wound, use Shadow’s Coil. In this way, the enemy is doing a lot less damage in that first round of combat. Keeping it really simple: you get to save half the wounds done on average, and that’s a good thing.
If you want more deatil, let’s take a look at some numbers. It’s important to remember that you’re going to attack first, so you will obviously reduce the amount of damage you’re taking by killing models! For this example, I’ll use a unit of 6 Chaos Knights charging into a unit of 6 Wardancers. The key stats for Chaos Knights: WS5, S4 (6 on the charge), T4 and a 3+ Armour Save. If we use Storm of Blades, we’ll do 0.7 unsaved wounds. If we use Whirling Death, we’ll do 0.96 unsaved wounds. And for Shadow’s Coil or Woven Mist, it’ll be 0.47 unsaved wounds. None of these look great in terms of actually doing damage to the knights … clearly this is a poor matchup for us, and we are not expecting to win this combat, so it becomes about survivability while we bring in some support from other units.
OK, so now we know how many Knights are actually attacking us–it’s likely to be all 6. I’ll keep the decimals in for the purposes of calculating averages, but obviously in a real game it’ll only be whole numbers of attacks – we’ll need to be lucky to have killed a knight before taking the hit).
Dance
Attacks
Hits
Wounds
Unsaved
Diff
Storm of Blades
5.3
2.65
2.21
1.84
1.14
Whirling Death
5.04
2.52
2.1
1.75
0.79
Shadow’s Coil
5.53
2.77
2.3
1.15
0.68
Woven Mist
5.53
1.84
1.54
1.28
0.81
The Diff column shows the difference between wounds dealt by the Wardancers and wounds taken.
There are some other situations where The Shaow’s Coil is beneficial, but they are all similar to this one: you’re not going to do much damage to the enemy, so focus on surviving.
Woven Mist
You can also see from this table that Woven Mist will mean that a lot fewer attacks actually hit. Against most things, Shadow’s Coil is usually better, because a -1 to hit is less good than straight up canceling half the wounds. However, there is one main exception, and it’s when you’re enemy is already naturally hitting on 5s, so I’ll recommend that you use Woven Mist against large blocks of WS2 troops. Going from being hit on 5s to being hit on 6s is a 50% reduction in hits on average (3s to 4s is 25%, 4s to 5s is 33%), and you’ll still have your 6++ Talisman Tattoos save, so you’ll end up taking the least amount of damage possible with Woven Mist in those circumstances.
In the natural course of things, you’ll be hit on 4s by everything unless it is WS2 or lower. Anything WS2 or lower in the game is generally not very tough or well armoured (think Goblins), so likely you’d be choosing a dance like Storm of Blades to just kill the fighting rank of Goblins and not take very much damage back anyways. That being said, there are two ways to lower the enemy WS or reduce their chances to hit in other ways which can sometimes mean that this is the right approach.
The two possibilities open to the Asrai are: Glittering Robe (-1 to hit), Befuddlement of Mischiefs (-1 to WS and I), both of which are only available to characters, which of course leads to discussion of the Shadowdancer and her role in the unit and in the army. She can be a L1 Illusion Wizard and take Glittering Robe, but as an L1, she’s not likely to be able to cast that spell very often. Here’s my casting spreadsheet in case you want to be able to see the odds for yourself. It’s only 23%, or just under 1 in 4.
Not amazing odds, and it only really pays off vs WS3, dropping them to WS2. So, we’re left with Befuddlement, which as I’ve said in severalplacesbefore, I much prefer to take on one of my Great Stag characters. Sometimes that character will get to be in a combo attack with Wardancers, and that might be another time to use this Dance. However, usually one of the other dances is more appropriate, because you’re trying to wipe out the fighting rank of the enemy rather than worry about saving lives.
Shadowdancer
This seems like a good time to talk about the Shadowdancer now. This character can only really be in a unit of Wardancers. Sure, theoretically they could run solo but then they don’t get to use any of the dances (thanks to their Troubadour of Loec special rule–they can only dance when they’ve got buddies) and their Loner special rule means that they can’t join any other unit in the army. So, really they are in a unit of Wardancers or not at all. Other than the Dances of Loec special rule, they have all the same special rules as Wardancers. At 85 points you get a WS8 S4 character, with 3 attacks base, rising to 4 on charge from Furious Charge, and possibly to 5 (with Storm of Blades).
You must equip them with one of Spear of Loec (for Killing Blow, AP -1, AB (2) and S+1) or Tricksters Blades which Requires Two Hands (pointless, but there you go) and grants D3 extra attacks. S4 attacks with no AP are not amazing, no matter how many you have, so my preference is for the Spear of Loec, which is like a better Headsman’s Axe, for 0 points. It’s almost like the Shadowdancer is only costing you 40 points? Against infantry or cavalry, which I’m sure you’ve realized now are the best targets for Wardancers, the Killing Blow will kick in every now and again … remember that those pesky Bretonnian Dukes on Royal Pegasus are cavalry and can die to this! No armour or Regen, so just whatever ward save they have. (In case you’re wondering, and I was, the Armour Bane kicks in when you’re fighting something that isn’t Infantry or Cavalry, so it’s still a nice to have). The threat of Killing Blow is usually scarier than the reality, so use the threat of it to your advantage! Remind your opponent that they have it any time they’re about to declare a charge 🙂
You can turn the Shadowdancer into a L1 Wizard for 35 points, and give either Battle Magic or Illusion. As noted before, you’ve only a 23% chance of casting the Glittering Robe or a 24% chance of Hammerhand, assuming your opponent has a L4 nearby. Even if their L4 is dead or in combat, assuming they have a Fated Dispel, your chances of success are only 31% and 38% respectively. On the whole, I think it’s not worth the points for the Wizard upgrade. The randomness of spell generation means that relying on getting any spell other than the signature is kinda pointless, and the Lore of Athel Loren doesn’t really have any spells that synergize well with the Shadowdancer.
So this leaves magic items. What can we give our Boogie Knight that will make them do their job better than what we get for free with the Spear of Loec? Clearly our eye is drawn to the Blades of Loec, as the name suggests they are tailor-made for a Wardancer, no? Blades of Loec work the same as Tricksters Blades except they are Magical Attacks, cost 45 points, and let you reroll failed rolls to wound. See my previous comment about S4 attacks with no AP–this is a bit of a fail from a design perspective in my opinion. I think the Monster Slaying sword is not great because you really don’t want to have this unit fighting monsters in general. None of the other magic weapons seem worth the points compared to the free Spear of Loec. The Shadowdancer can’t take any armour, so that is out. Looking at Talismans, the Paymaster’s Coin is expensive for what it does. Obsidian Lodestone is not bad as a defensive item for this unit, but in general I think you want to avoid them being targeted and use Evasive rather than try to rely on MR to keep them safe. Merciw’s Locus doesn’t seem useful for a model that’s T3. Glamourweave is meh, the Ld test is too easy for most models to pass unless you lean into anti-Ld stuff. Which really just leaves us with Enchanted Items. The one that appeals to me the most is the Potion of Strength (and you can actually take two of these). No matter what you roll, you’ll get at least S6 attacks, which can really help against T4 troops, something that Wardancers struggle against. It can also act as a deterrent … if your opponent knows you might suddenly become S8, they may act differently! Again, the threat is often better than the reality. I think if you have 25 points to spend, this is not a bad option for the Shadowdancer, but now you’be got a 130 point character who only has 2 wounds and a 6++ ward save … so, my personal preference is to just run the Shadowdancer with Spear of Loec and no upgrades.
On the Battlefield
OK, final thoughts here on how I’m using Wardancers on the battlefield. They are backline troops, not frontline. They protect archers and wizards who want to be staying back and fighting from afar, but are generally very squishy. They pair really well with Dryads, who can take the first hit and allow a good countercharge from the ‘dancers. They work very effectively against T3 troops, including heavy cavalry such as Knights of the Realm. I run a unit of 5, with extra hand weapons and a champion, to really maximize the ability to get into base contact with whatever you’re charging, and with a low point cost of 91. They will struggle against T4+ with a good armour save, unless you also give them magical support (e.g. Plague of Rust). They are not heavy hitters, but they can often catch opponents off guard with their versatility. Too many points invested in the unit will likely mean that you will not get your points back. If you’re bringing a Shadowdancer, make sure and keep more Dryads around to ensure the character can’t be targeted, and maybe take a potion of Strength if you’re seeing a lot of T4 high armour folks get into your back lines.
How are you using your Wardancers? Have you had much success with them? Any builds for Shadowdancer I didn’t consider? Would love to hear ideas and war stories in the comments 🙂